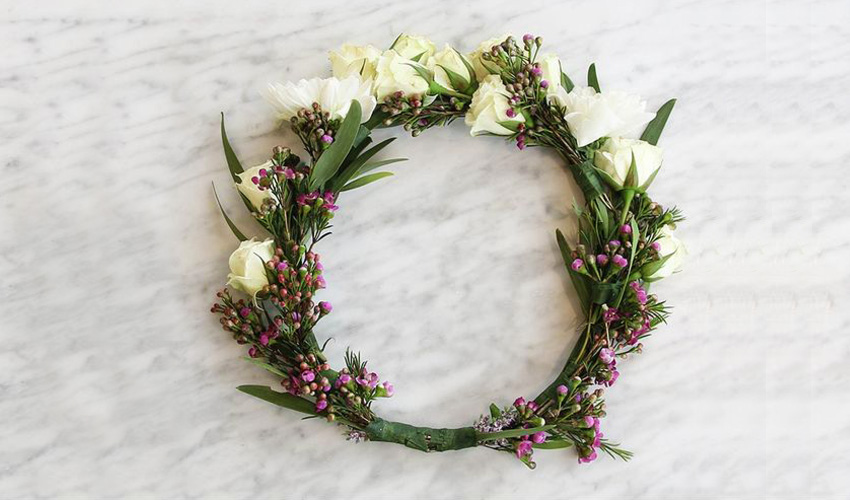
How you style your hair can have a huge effect on how you look. This may seem like I’m stating the obvious here but it’s surprising how many women just don’t bother putting much thought into their hair as they are planning their outfit. That’s why so many of us end up going with a quick pony tail or bun just to get our hair out of the way. Headbands have made it easier to solve the problem quickly but their simplicity leaves the look lacking sometimes. Flower crowns can be the perfect answer for many looks. They’re chic, they’re retro and they’re a beautiful conversation starter that will illicit smiles and compliments. Best of all, once you put in the initial work of making one, they’re just as quick and easy to use as any headband. Check out our tips on how to make a flower crown![signy_about about_title=”You’ll need:”][/signy_about]
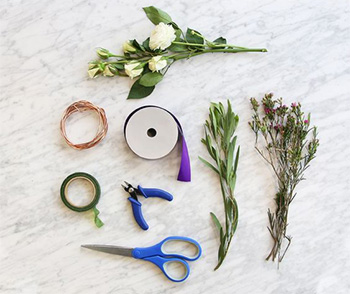
Flower wire (Gauge 20 or higher)
Floral tape
Wire cutters
Greenery (leaves and vines) or flowers
Embellishments (optional)
Hot glue gun or crafter’s glue
[signy_about about_title=”Step-by-step Guide”][/signy_about]
-
First, you’ll need to measure your head. You can do this with tailoring tape or skip the middleman and just use the wire you plan to use to make the crown. Either way the method is the same – wrap the tape or wire around your head and cut to size. The crown should be snug but not tight. Keep in mind you’ll be wrapping the wire and adding flowers so a small amount of play is fine when measuring with the bare wire.
- Once you have your wire frame, wrap it with the green floral tape. This will keep the wires from showing through and will also protect your hair and skin from being poked by the sharp end of a wire.
-
This is where you choose the greenery, flower and embellishments you want to use. Most people use fake leaves and flowers when making a crown so they can wear it over and over again. Having said that, making a fresh flower crown with in season blooms can be a lot of fun. These crowns won’t last as long but their natural beauty and fragrance add something special.
-
Once you know what you want to use to make a flower crown, begin by setting a foundation of greenery. This can be small vines, leaves or ivy that will serve as the background of the crown. Twist the wires from these pieces around your crown and snip off any extra wire from the end. Don’t worry if they are a bit wobbly at this stage, we’ll firm everything up at the end.
-
Add in your flowers. As a general rule of thumb, flowers should be kept simple with the option for one larger bloom as a focal point. Choose colors that complement one another. Once again, twist the wires from these flowers through and around to the main crown and snip off any extra wire.
- Now it’s time to firm everything up. You can use a hot glue gun which provides quick drying time or use crafter’s glue if you can leave the crown to sit overnight before wearing. Put small dabs of glue behind larger blooms and press them directly to the crown. Use glue sparingly and in places it won’t be noticed.
- If you want to add any small embellishments, this is the time to do it. Small gemstones, ribbons or other accents can be positioned and glued in place as you’re securing the greenery and flowers.
Once the crown dries, slip it on and be amazed. Once you see how easy these are to make you’re likely to develop quite the collection. Store flower crowns on open ended trouser hangers or on suspended wooden dowels to prevent damage. The flowers and greenery can be cleaned using a soft rag dampened with warm, slightly soapy water. Stored properly, flower crowns can last for years, adding a unique flourish to your wardrobe.
Source: Pintrest
